Activity Checklist:
1. Current setup info(Prior migration).
Setup(Standalone/Distributed/Cluster) : Distributed
CP OS : Gaia
CP Version : R77.30
Hardware model : Open Server
Mgmt Host name : ManagementServer
Firewall Host name : LabFirewall
Mgmt server IP add : 1.2.3.10
Firewall IP address : 1.2.3.20
2. Proposed setup info(After migration) :
Setup(Standalone/Distributed/Cluster) : Distributed
CP OS : Gaia
CP Version : R80.10
Hardware model : Open Server
Mgmt Host name : ManagementServer
Firewall Host name : LabFirewall
Mgmt server IP add : 1.2.3.10
Firewall IP address : 1.2.3.20
3. Change freeze time :
4. Recommended to take needful backups(migrate export, backup & snapshot). Refer SK54100 for procedure.
5. Backup of fwopsec.conf file from the $FWDIR/conf path. (If any OPSEC LEA is configured)
Activity flow :
1. Generate a fresh backup (migrate export) from the live server, please refer SK54100 for the detailed procedure.
- Make a note of the MD5 value of the generated file.
- Take it out of the Management server.
Reference policies

Generating migrate export for lab replication :

2. Create a replica of your Management server.
- Host-name should be same.
- IP address should be same.
- CP version should be same.
- CP OS should be same.
3.
Import the backup file which you generated in point-1 on the lab
replica Management server, please refer SK54100 for the detailed
procedure.


4. Login to R77.30 Gaia Smart Dashboard and cross check the configuration.

5. Download the R80.10 Gaia migration tools from the below link :
(R80.10 Management Server Migration Tools for Gaia Pre R80") :
https://supportcenter.checkpoint.com/supportcenter/portal?eventSubmit_doGoviewsolutiondetails=&solutionid=sk111841&partition=General&product=All%22
6. Copy this migration tools to the R77.30 Gaia lab replication Management server under $FWDIR/bin/upgrade_tools

7. Extract the copied migration tools of R80.10
#tar -zxvf filename

=====================================================
NOTE : Run Pre-upgrade verifier to check the conflicts. For procedure, refer sk110267.
=====================================================
8. Generate a backup (migrate export), please refer SK54100 for the detailed procedure.
- Make a note of the MD5 value of the generated file.
- Take it out of the Management server.

9. Download the R80.10 Gaia New installation/fresh installation image from the below link :
https://supportcenter.checkpoint.com/supportcenter/portal?eventSubmit_doShowupgradewizard
10. Do a fresh installation of R80.10 Gaia Management server in your lab setup.
- Host-name should be same.
- IP address should be same.
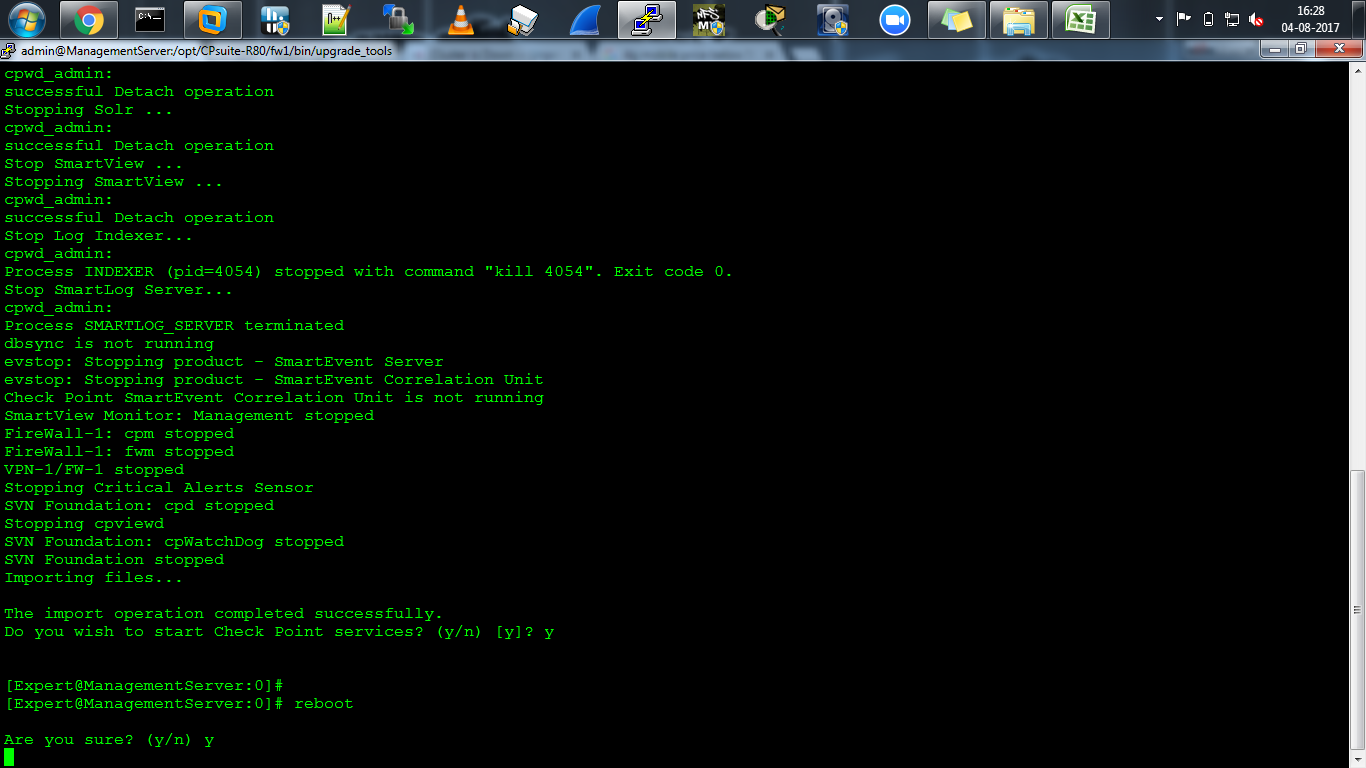
11. Import the backup(migrate import) which you have generated in
point-8, please refer SK54100 for the detailed procedure & reboot
the Management server to load the configuration.

12. Download the R80.10 GUI console from the below link :
https://supportcenter.checkpoint.com/supportcenter/portal?eventSubmit_doGoviewsolutiondetails=&solutionid=sk111841&partition=General&product=All%22
13. Login to Smart dashboard and cross check the configuration.

====================================
Once the lab migration is successful :
====================================
NOTE : Pay attention to the R80.10 Gaia pre-requisites.
========================================
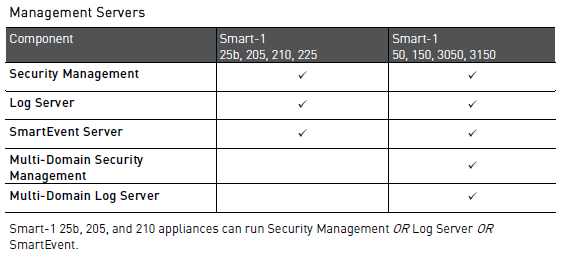
- Compatible devices/models

- Open server configuration requirements

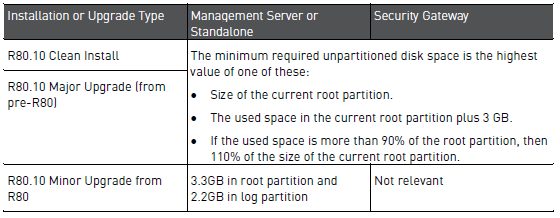
- Disk space requirements
- Browser compatibility

- Smart Console compatibility

- Mgmt to Firewall/cluster members compatibility

========================================
14.
Load the R80.10 Gaia fresh installation image with a Isomorphic USB,
you can refer the below link for the detailed procedure for the
Isomorphic tool :
15. Using this Isomorphic USB do a fresh installation of R80.10 Gaia.
- Hostname should be same.
- IP address should be same.
16. Import the backup which you have generated in point-8, please refer SK54100 for the detailed procedure.
17. Download the R80.10 GUI console from the below link :
https://supportcenter.checkpoint.com/supportcenter/portal?eventSubmit_doGoviewsolutiondetails=&solutionid=sk111841&partition=General&product=All%22
18. Login to Smart dashboard and cross check the configuration.
NOTES :
- We highly recommend you to install the latest jumbo hotfix take.
-
There can be a change in the installation images, migration tools and
smart console. It is recommended to install the latest ones.
Comments
Post a Comment