
Palo Alto VPN Speedtests

Palo Alto VPN Speedtests

Once more some throughput tests, this time the Palo Alto Networks firewalls site-to-site IPsec VPN. Similar to my VPN speedtests for the FortiGate firewall, I set up a small lab with two PA-200 firewalls and tested the bandwidth of different IPsec phase 2 algorithms. Compared to the official data sheet information from Palo Alto that state an IPsec VPN throughput of 50 Mbps, the results are really astonishing.

(This is one of many VPN tutorials on my blog. Have a look at this full list.).)

Lab

My lab consists of two PA-200 firewalls with PAN-OS 7.1.1 installed. They were plugged into a simple layer 2 switch. The two notebooks were booted with Knoppix 7.6.1 and used Iperf version 2.0.5.
Palo Alto VPN Speedtests Labor
I first tested the throughput with only routing and then built the VPN. After every test I changed the phase 2 parameters. The Iperf tests ran in both directions. Here are some configuration screenshots:
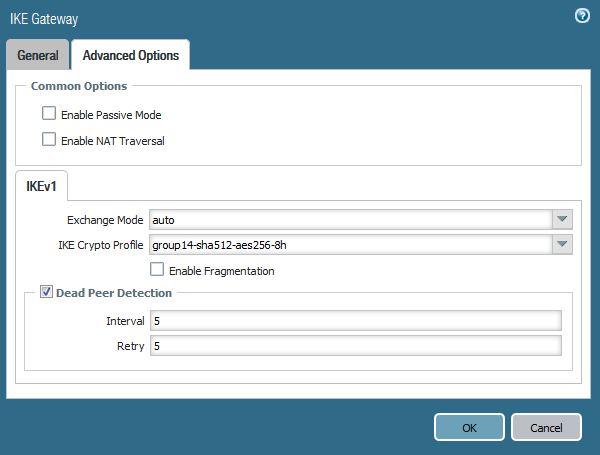
Of course I verified the correct IPsec algorithms after each change, such as here:

Test Results

Here are the results, each Tx/Rx in Mbps:
Palo Alto VPN SpeedtestsNo VPN TxNo VPN Rx3des-sha1-group2Tx3des-sha1-group2Rxaes128-sha1-group5 Txaes128-sha1-group5 Rxaes256-sha256-group14 Txaes256-sha256-group14 Rxaes256-sha512-g…aes256-sha512-g…02505007501000MBit/s
foobarNo VPN TxNo VPN Rx3des-sha1-group2 Tx3des-sha1-group2 Rxaes128-sha1-group5 Txaes128-sha1-group5 Rxaes256-sha256-group14 Txaes256-sha256-group14 Rxaes256-sha512-group20 Txaes256-sha512-group20 Rx
blubb937934198228215271205254212260
And the raw values:
  • Only routing: 937/934
  • esp-3des-sha1-group2-1h: 198/228
  • esp-aes128-sha1-group5-1h: 215/271
  • esp-aes256-sha256-group14-1h: 205/254
  • esp-aes256-sha512-group20-1h: 212/260
That is: All tests are around 200 Mbps. The Tx direction is always a bit slower, which might be a test failure. The AES algorithms are faster than the old 3DES cipher. This might be related to the fact that AES is made to be fast in software and in hardware.

Comments

Popular posts from this blog

How to modify SSH/HTTP/Telnet time out in Cisco ASA firewall?

How to modify SSH/HTTP/Telnet time out in Cisco ASA firewall? By default tcp idle timeout is 1:0:0 hh:mm:ss. If in case you need to modify it you can do it by MPF (Modular Policy Framework). Let us setup a custom timeout when traffic is coming from particular host 10.77.241.129. !— Match the traffic using the access-list —! object-group service DM_INLINE_TCP_1 tcp port-object eq www port-object eq ssh port-object eq telnet access-list outside_mpc extended permit tcp host 10.77.241.129 <source ip> any object-group DM_INLINE_TCP_1 !— Define the class map Cisco-class –! class-map Cisco-class match access-list outside_mpc !— Call this class-map into policy map and set the connection reset after 10 min when traffic is coming from particular host —! policy-map Cisco-policy class Cisco-class set connection timeout idle 0:10:00 reset !— Apply the policy-map Cisco-policy on the interface. —! service-policy Cisco-p...

Checkpoint firewall common commands part 2

Checkpoint firewall common commands part 2 For basic firewall informaton gathering: fgate stat -Status and statistics of Flood-Gate-1. fwaccel <stat|stats|conns>  – View status, statistics or connection table of SecureXL. fw getifs -Show list of configured interfaces with IP and netmask. cpstat <app_flag> [-f flavour] -View OS, HW and CP application status. Issue cpstat without any options to see all possible application flags <app_flag> and corresponding flavours. Examples: cpstat fw -f policy – verbose policy info cpstat os -f cpu – CPU utilization statistics cpinfo -y all   -List all installed patches and hotfixes. cpd_sched_config print -Show task scheduled with CPD scheduler. enabled_blades -View enabled software blades avsu_client [-app <app>]   , get_version <app>  -Get signature version and status of content security .Without the -app option “Anti Virus” is used. show co...

FortiGate: Upgrading the firmware via CLI

FortiGate: Upgrading the firmware via CLI To use the following procedure, you must have a TFTP or FTP server that FortiDB can connect to. You must also log in using the “admin” administrator account. Start the FTP or TFTP server. Copy the new firmware image file to the FTP or TFTP server. Log into the CLI. Verify that FortiDB can connect to the FTP or TFTP server. For example, if the IP address of the TFTP server is 192.168.1.168, enter the CLI command: execute ping 192.168.1.168 Enter the following command to copy the firmware image from the TFTP server to FortiDB: execute restore image ftp execute restore image tftp Where is the name and location of the firmware image file and or is the IP address of the FTP or TFTP server. For example, if the firmware image file name is image.out and the IP address of the FTP or TFTP server is 192.168.1.168, enter: execute restore image tftp image.out 192.168.1.168 FortiDB responds with the message: This oper...